- Uncategorized
Making Changes to Panopto Recordings with an External Video Editor
When we built Panopto, one of our primary design goals was to dramatically reduce the number of steps and the amount of time required to record, produce, and share video presentations. To achieve this goal, we built a video platform that automates many of the video production tasks that have traditionally required human interaction and third-party software.
For example, when you record a presentation with Panopto, our system automatically synchronizes video of the presenter, their slides, and any other materials included as part of the presentation, such as document cameras, screen recordings, and digital whiteboards. This eliminates the need for a videographer to manually synchronize these feeds in post-production.
Similarly, Panopto automatically uploads recorded presentations to a video content management system (video CMS). Once uploaded, Panopto automatically encodes the presentation for multi-bitrate streaming to any desktop, laptop, tablet, or smartphone. This eliminates the need to create multiple encodings manually, to upload these encodings to a secure repository, and to configure that repository for media streaming.
Below is a diagram that illustrates the steps of video capture and production that Panopto automates. Click the image for a higher-resolution version.
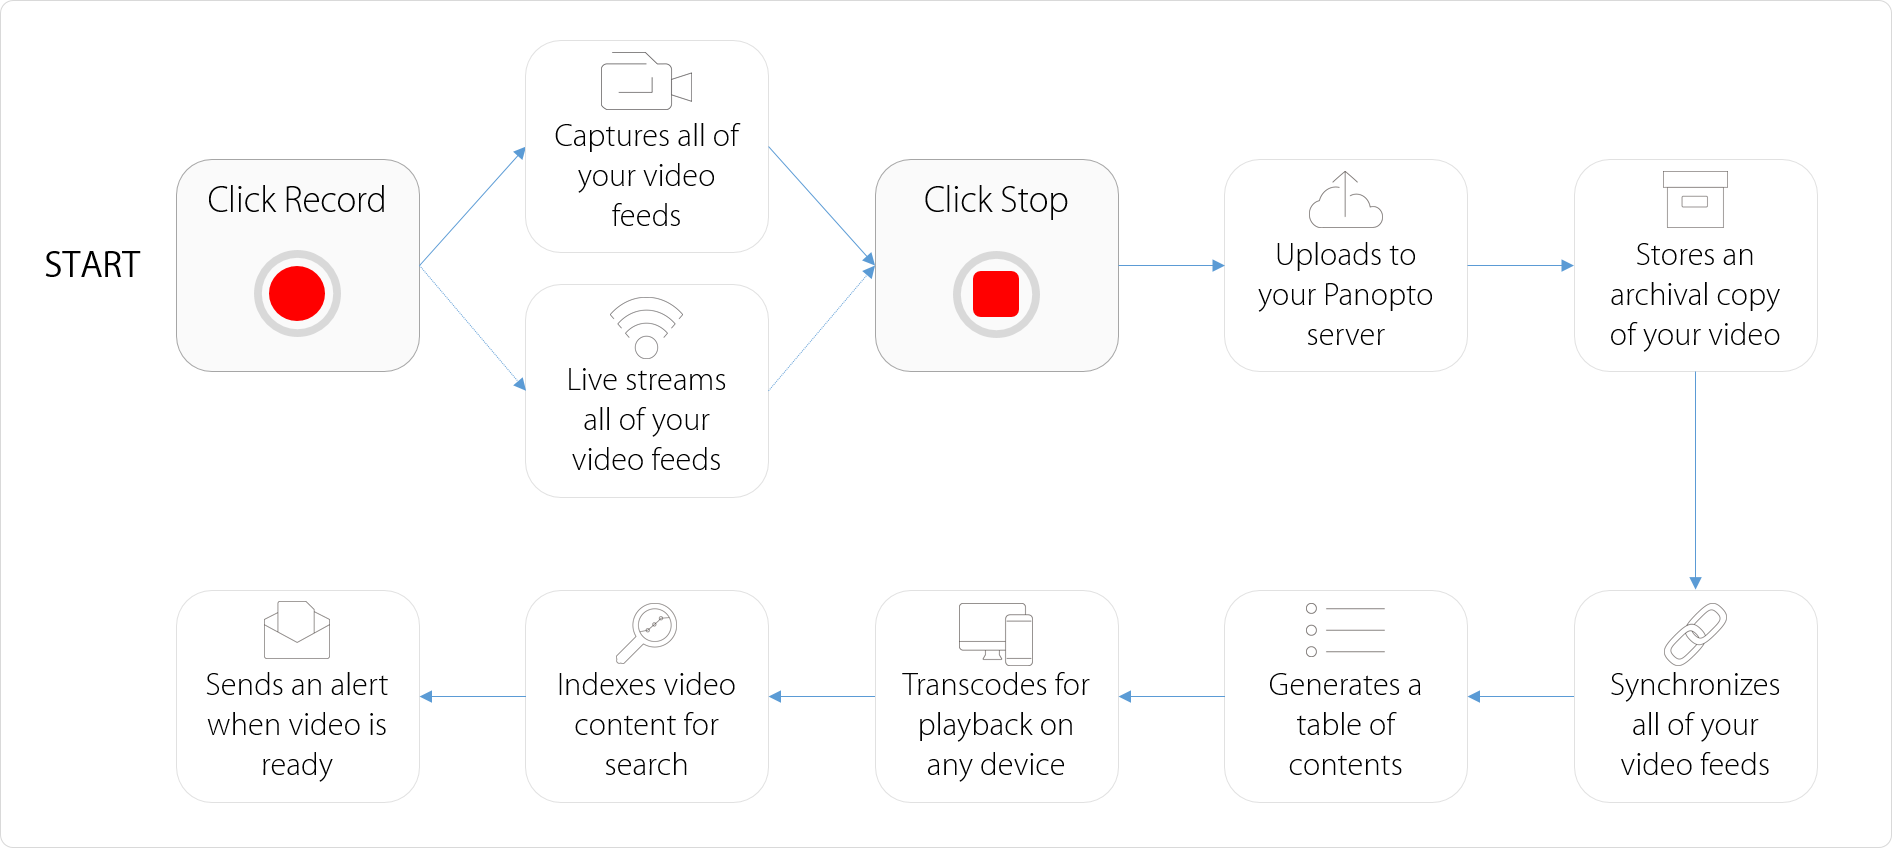 Panopto automates most steps of the video capture and production workflow. You simply click record, present, and then click stop. All other tasks are handled automatically by Panopto.
When videos do require manual post-production, Panopto provides a web-based editor that supports a range of basic editing tasks. These include:
- Trimming the top and tail of videos
- Cutting segments from the middle of videos
- Adding bumper videos to a recording
- Remixing multiple videos
- Editing the captions and table of contents
- Moving and replacing slides in a video presentation
- Embedding live web content, such as quizzes and surveys
- Switching video feeds that appear during playback
Of course, some videos require more extensive post-production functionality that can only be found in professional video editing software. Tools like TechSmith Camtasia, Adobe Premiere, Sony Vegas, Apple Final Cut Pro, and Cyberlink PowerDirector provide the ability add overlays, perform advanced transitions, manipulate color, edit individual audio tracks, add effects, and more.
If you are looking for a powerful video editor that easily creates more polished videos, we recommend TechSmith Camtasia. With Camtasia, you can export videos directly to your Panopto library with one click.
Using Professional Video Editing Software With Panopto
As more and more AV professionals in businesses and universities use Panopto, we’ve received a growing number of requests for the ability to edit Panopto recordings using these and other external editors. So in the latest release of Panopto, we’ve included a feature that enables this capability. Below is an overview of how AV teams and videographers can use the feature to make more advanced edits to their Panopto recordings.
Output Panopto Recordings to MP4 Files
The first step to editing Panopto recordings in an external editor is to enable a setting in the Panopto Windows Recorder. This setting instructs Panopto to capture recordings as local MP4 files.
To do this, navigate to the Settings tab in the Panopto Recorder, then to the Advanced Settings sub-tab. Check the Capture in MP4 format checkbox and click Save.
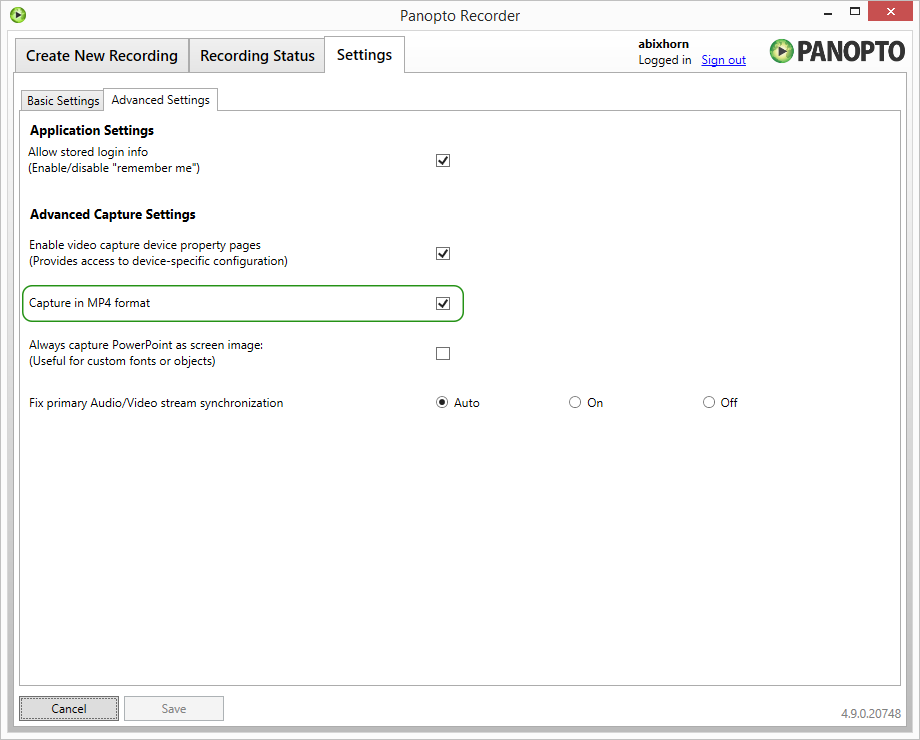
Once this is checked, every feed recorded using Panopto will be output as an individual MP4 file, encoded using the H.264 video codec and the AAC audio codec.
Making Changes to a Single-Feed Video
To edit a Panopto recording that consists of a single video feed (typically a simple webcam video with audio, or a screen recording with audio):
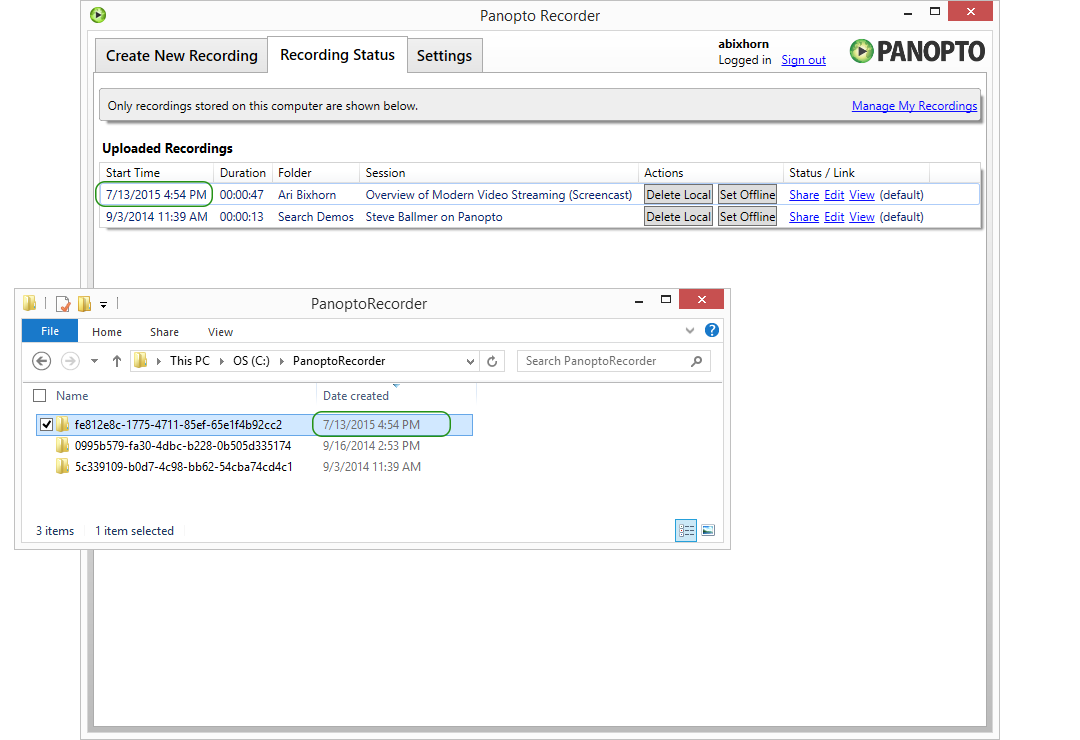
- Navigate to the folder on your hard drive where your Panopto recordings are stored. By default, Panopto uses C:PanoptoRecorder. Within this directory, you’ll see a list of subdirectories. Each subdirectory contains a Panopto recording.

- To find the subdirectory that includes the recording that you want to edit, compare the Date created column in Windows Explorer to the Start Time column in the Windows Recorder’s Recording Status tab:
- Open the subdirectory and find the MP4 file. For a single-feed video, the filename will be: [GUID].DV.localview.mp4.

- Open the MP4 file in your video editor and make any changes. In this case, I’m using CyberLink PowerDirector 13.
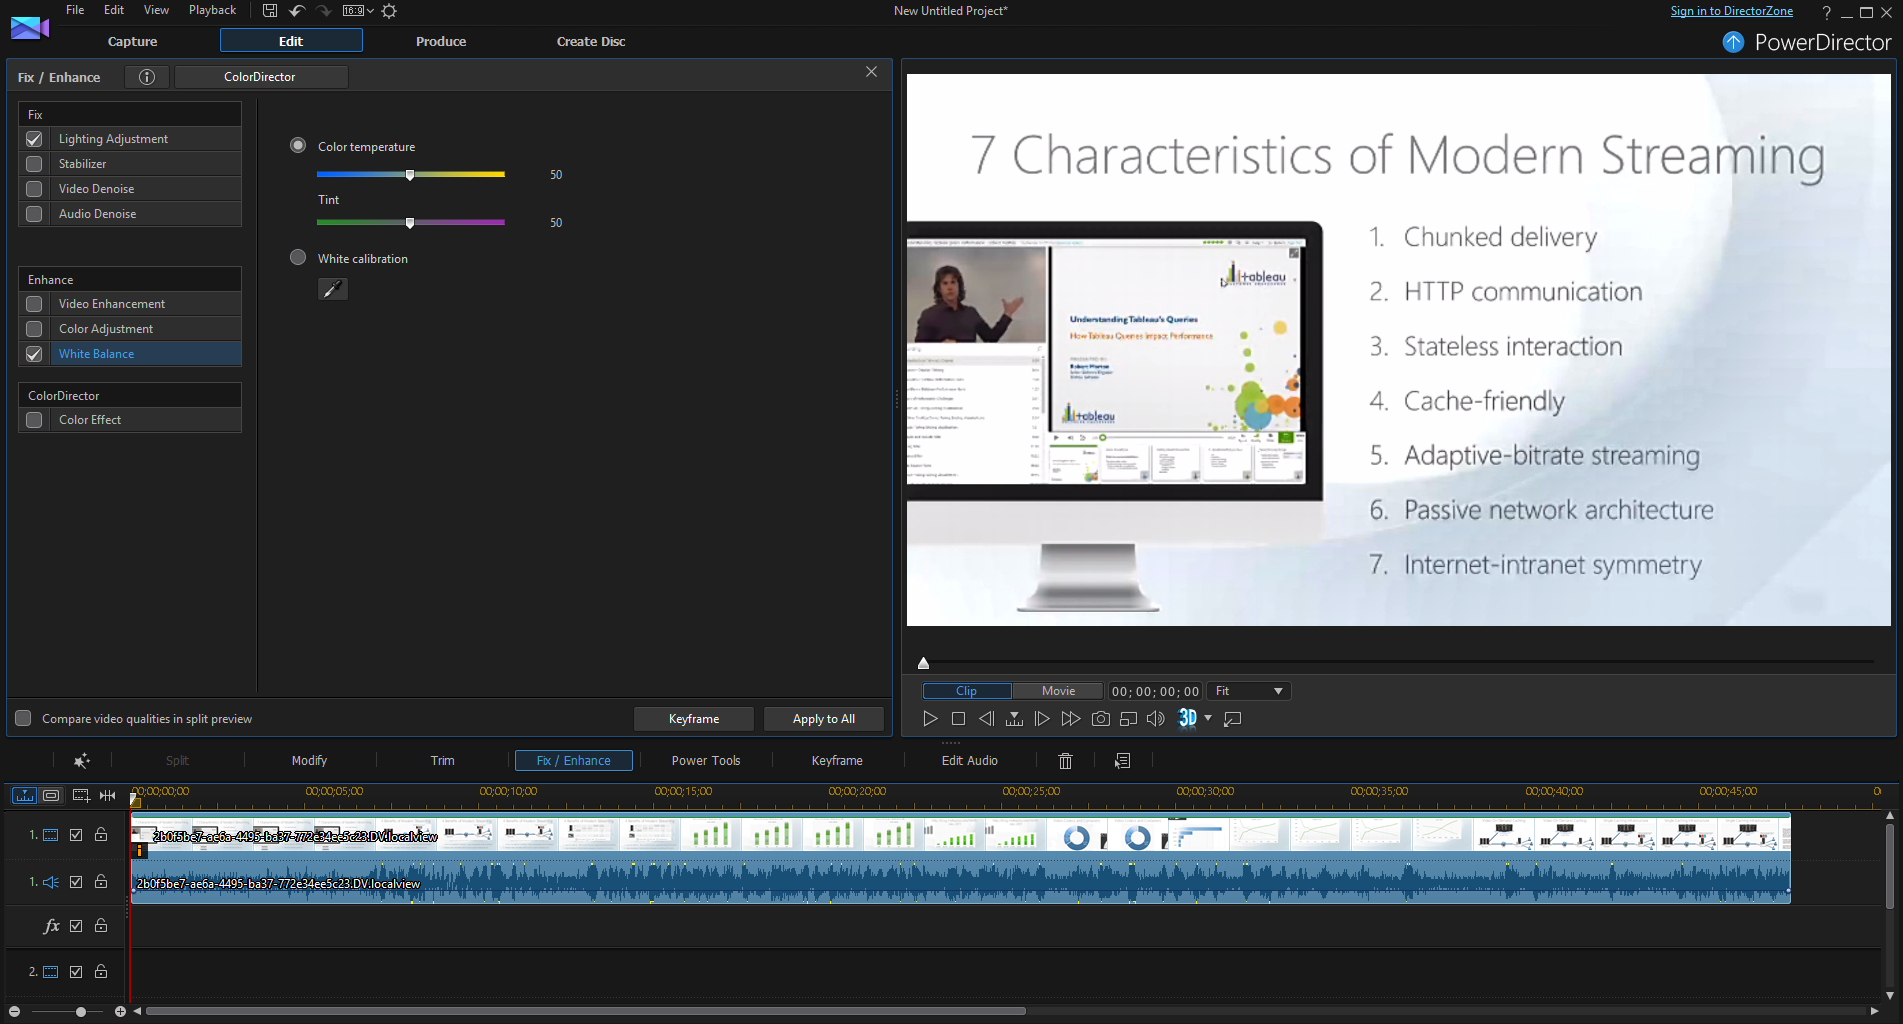
- Produce your edited video as your normally would. You can save the video in any local or network directory and name the video as you see fit. Just be sure to save your video into one of the formats supported by Panopto.
- At this point, you’re ready to upload your edited video to Panopto. From your Panopto website, click the Create button and select Upload Video.
- Drag your video into the drop-area, and the file will begin uploading.
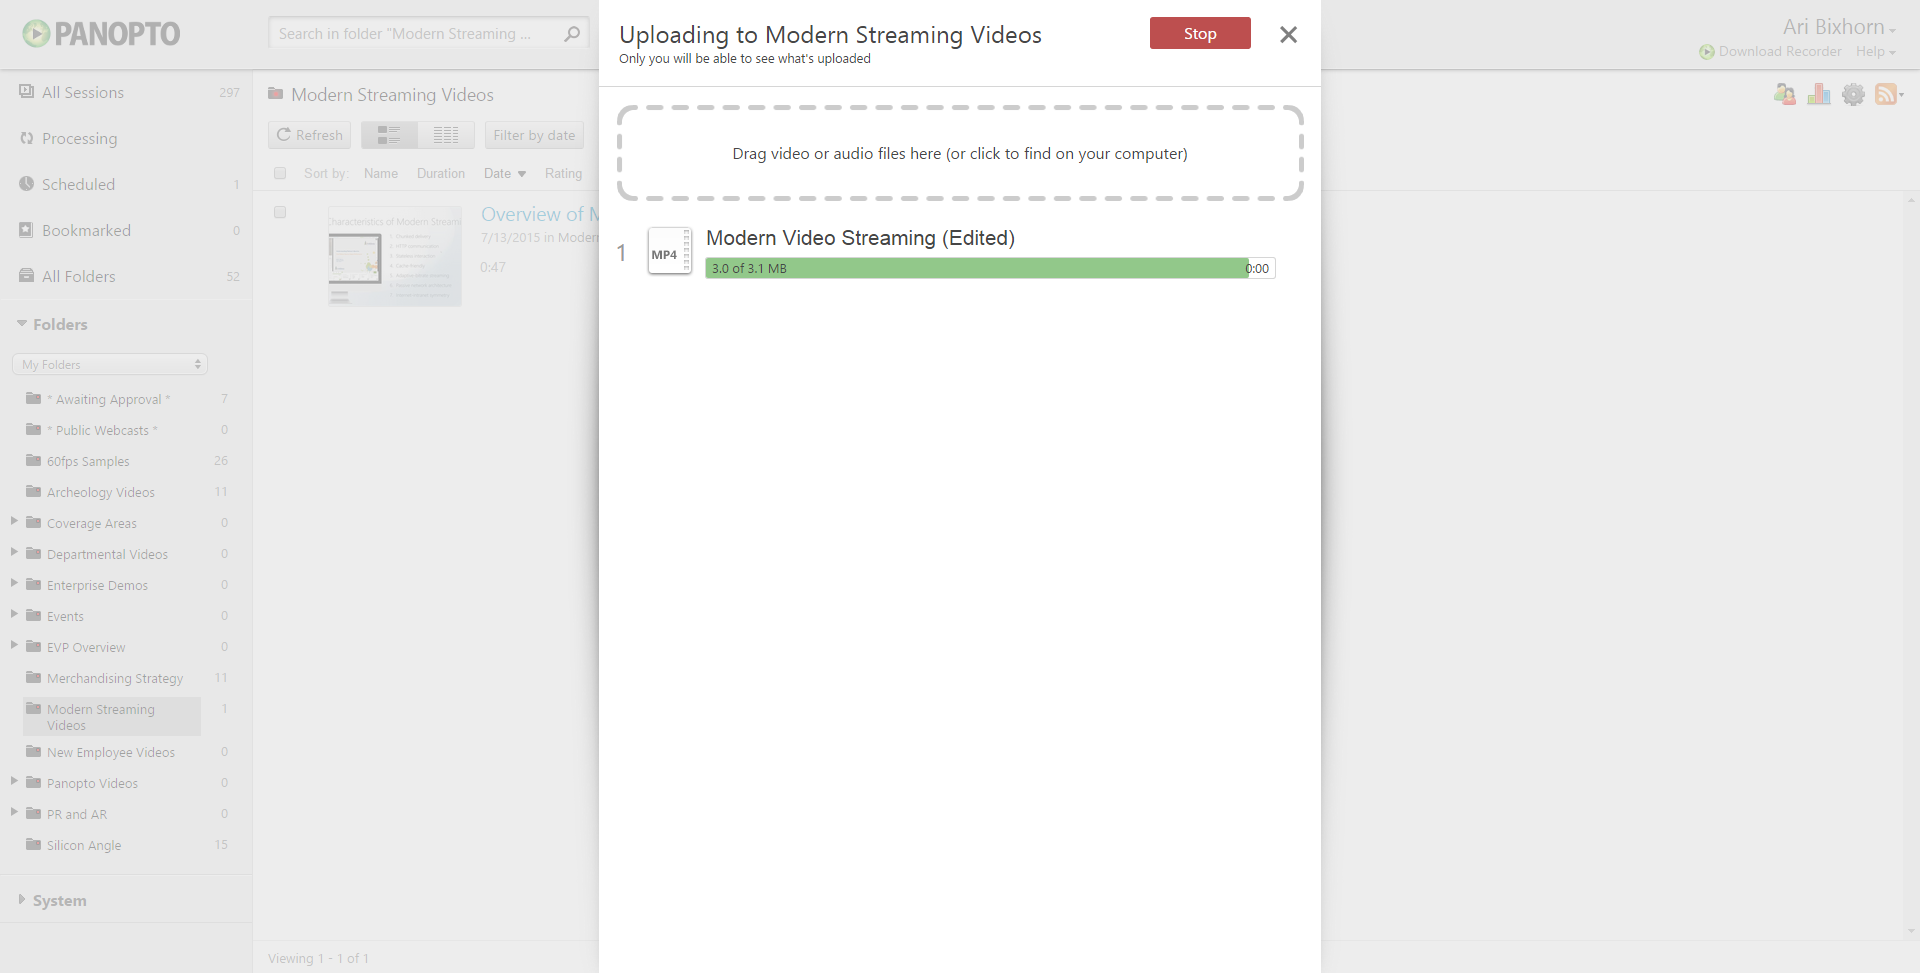
- Once your video is uploaded, Panopto will encode it for playback on any device, and will index the contents within your video for search. If you no longer need the original copy of your video, you can delete it or set it as unavailable using Panopto’s availability windows.
Making Changes to a Video with Multiple Feeds
Most Panopto recordings contain at least two video feeds — the recording of the presenter, and the recording of their on-screen content. When editing one of these feeds, most of the steps listed above will still apply. However, uploading the edited video will typically be done within Panopto’s web-based video editor, and you need to consider how edits to video duration impact the overall video presentation.
- Navigate to the directory of your Panopto recording by following Steps 1 and 2 above.
- In this directory, you’ll now see more than one MP4 file. Each MP4 file is one of the recorded video feeds. For a typical video presentation consisting of presenter video and on-screen content, you’ll see:
[GUID].DV.localview.mp4 ← This is your presenter video
[GUID].SCREEN.localview.mp4 ← This is your screen recording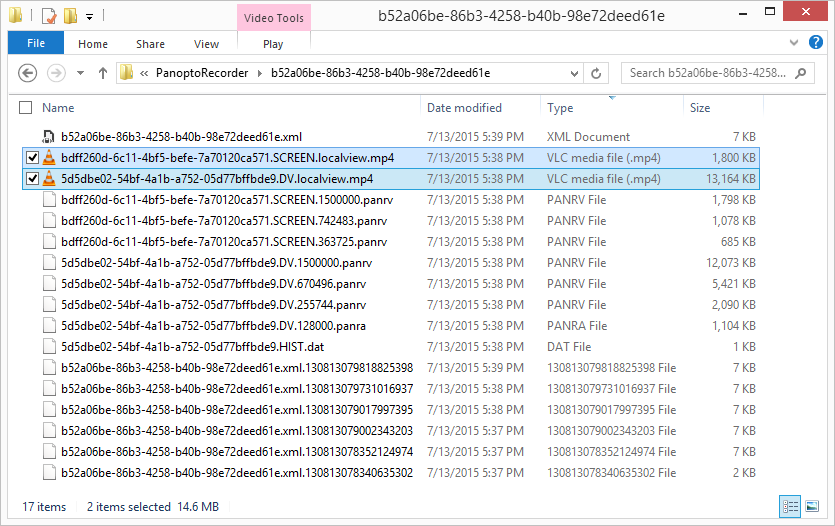
- Select the video feed that you want to edit, and make changes as described in Steps 4 and 5 above.
- When your edited video is ready to upload, you’ll typically want to import it directly into your existing Panopto recording. To do this, open Panopto’s editor by locating your recording in Panopto’s video library and clicking Edit.

- This opens the Panopto editor. Click on the Streams tab and, on the bottom left side, click Add a video.

- Select the edited video feed by clicking Browse and locating the file. If you’ve edited the presenter video, select Stream Type of Primary. If you’ve edited the screen recording, select Secondary. In this case, I’ve edited the presenter (primary) video. Click OK to upload the edited feed.

- Panopto will upload and process the edited video feed. When processing is complete, you’ll see the video feed listed under the Streams tab.
- You’ll now have two versions of the feed you edited – the original, and your edited copy. The next step is to remove the original, so that only the edited version remains. To do this, hover over the original feed under the Streams tab and click Delete. You’ll be prompted to confirm the deletion. Click OK.

- With your edits made, click Save in the Panopto editor. Panopto will re-encode your video presentation with the edited version of your feed.
Note: You should pay special attention if you change the duration of a video feed using an external editor, since the edited feed will no longer be in sync with the other feed from your recording. For example, if you use Adobe Premiere to trim out parts of your screen recording, the updated screen recording will have a shorter duration than the presenter video. In these cases, you’ll typically need to edit both feeds in the external editor to ensure that they remain in sync.
Send Us Your Feedback
Using an external editor with Panopto is an increasingly common workflow among our power users, and as we continue to develop future releases of our video platform, we’re looking for your feedback to better integrate the capability with your existing workflow. So send us your feedback. Let us know which video editor(s) you currently use and how you’d like to see the capability evolve in the future. Happy editing.


